Monday, August 27, 2007

first build continued #2

So, time to assemble the drum.
Didn't have the Drum layout mat at the time, so i had to do it the hard way!
The rims has 10 holes, and therefor I have to mark up the hole centers for the 10 lugs.

I have to be aware that the snare beds are placed between to lugs on both sides..

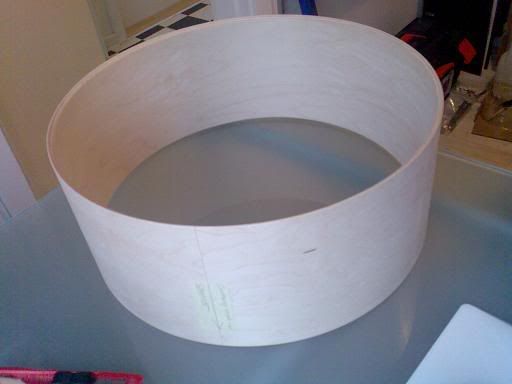
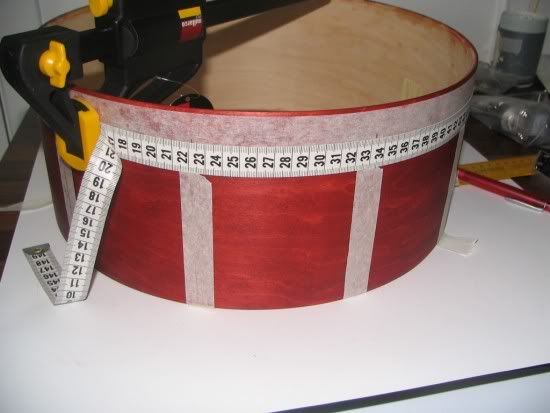
I put some tape on the top of the shell (because of the snare beds), and from the markings I put tape down the shell. That way I don't have to mark directly on the shell.


There's 111,1 cm around the shell, divided by 10 (10lugs) I get the distance between the lugs. 11,1 cm.
To get a starting point, I divide 11,1 with 2. That way I get the distance from the snare bed to the 2 lugs beside it. And then it's just about finding the the placement for the other lugs.

And off curse to check the markings about a 1000 times! Even the slightest error will be seen when you mount the lugs! Especially lugs with 2
holes = double damage possibility :-)


When you've checked the marking enough times, it's time to drill!!


next time I'll place the lugs and show you how to place the strainer + butt plate. And then the snare is almost done!!

see ya
/Kenneth

Saturday, August 25, 2007

first build continued...


So here's the lugs I ordered for the snare.
51mm (hole center) tube lugs. Should have bought them a bit longer, but It looks okay I think.


Here's the rims...DIE CAST of course! Gotta have die cast rims on your snare!!!


12mm Airvent


Got the parts ready for mounting, and we're off to go!!

more to come........

Friday, August 24, 2007

My first build

My first build was a 14"x5,5" Keller Maple snare, with die cast hoops and a Trick strainer.

I (water)dyed the shell in a mahogany finish, which turned out great! It got about 4 layers of dye, with sanding in between. And the I gave it also about 4 layers of oil, Rustikolie.
That way the shells natural look shows right through the dye.

Here's a picture of the raw shell
The shell came with bearing edges (45) and snare bed.


Here's the shell after the dying and oiling. It came out really nice.


Here are some pictures of one of the best strainer on the market, the Trick GS007


The backside

Thursday, August 23, 2007

Welcome to the Panic drums blog

Well..
This blog is about the fine art of drumbuilding. Here you can learn about building your own drums, and hopefully learn a lot from my mistakes and my experiences.
I'm going to post a lot of pictures and detailed information from the process of my projects, and thereby (hopefully) inspire YOU to go build some drums yourself.
Please feel free to ask me any questions about the drums and the building process....we both might learn something.....